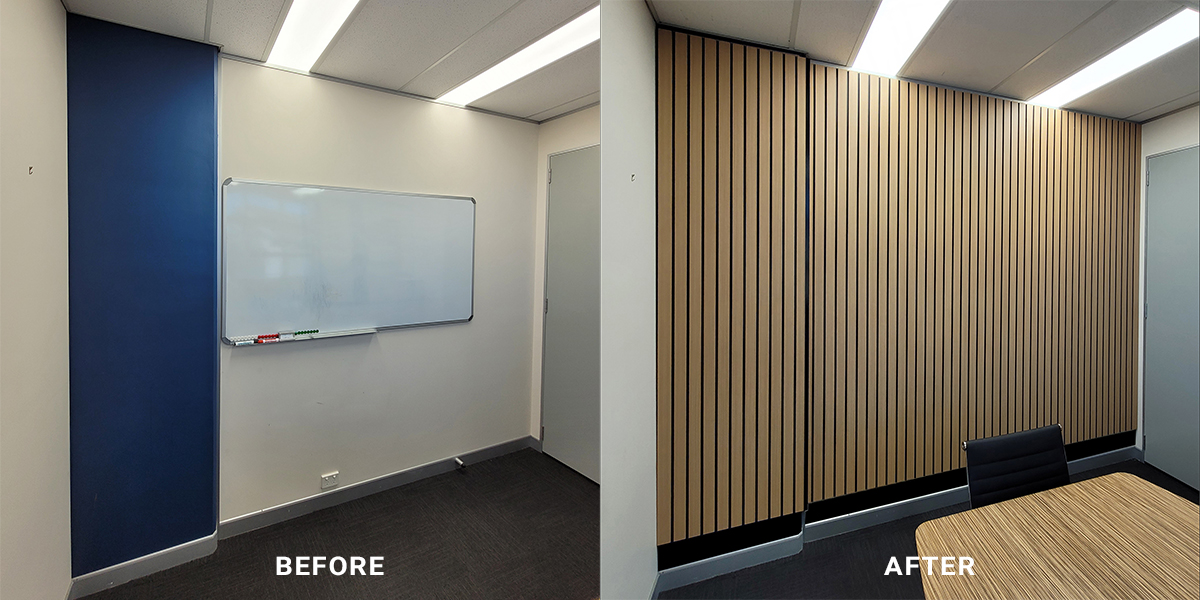
How To Install Swiftbatten Timber Batten Wall Panels
Swiftbatten Timber Batten panels offer a faster and more cost-effective way achieve the look of timber slat walls, wood slat walls and timber batten ceilings. See our video and step-by-step guide to learn how easy it is to install this innovative, Australian-made product.
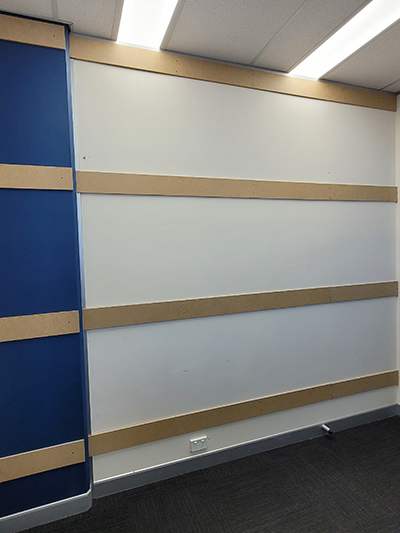
1. Start by choosing whether to add mounting battens along the wall or direct mount panels to the wall.
Adding mounting battens to the wall (as pictured) ensures you have the maximum versatility with mounting points and gives you the greatest certainty that the panels are securely mounted. By running horizontal thin battens, it allows for quick fixing into wall studs and when fixing the swiftbatten sheets any groove can be used to fix into.
Alternatively, if you choose, you can directly mount the panels onto the wall studs either with or without plasterboard. You can also fix direct if you have a wall substrate with easy fixings such as ply or timber studs with closely spaced noggings or a stable and correctly prepared masonry substrate.
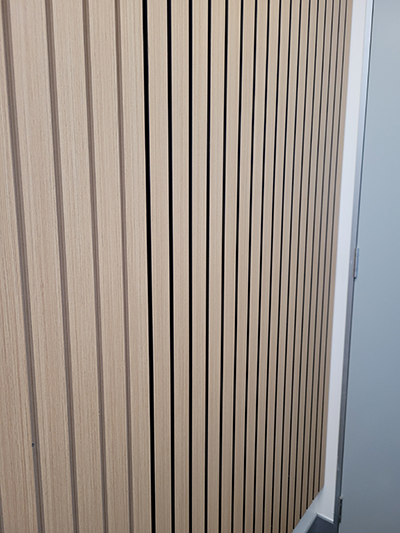
Swiftbatten panels measure 2400mm x 1200mm with 10mm grooves spaced across the board.
The main point to consider is, as the grooves run vertically you will need sufficient fixings across the width of each sheet to secure it. Whether you fix horizontal battens first or you direct fix to the wall it is suggested that you pre-plan this to ensure your mounting points are suitable for a secure installation.
2. Fix horizontal battens if choosing this method for mounting to wall.
If you have chosen to fix horizontal battens to the wall first, you will need 150mm to 200mm high strips of plywood, timber or suitable MDF strip. Fix 4 strips of battening to the wall evenly spaced with screws into the wall substrate. Where long walls are to be clad we suggest the joins in the strips be on a stud so the whole length of battening strip is secured.
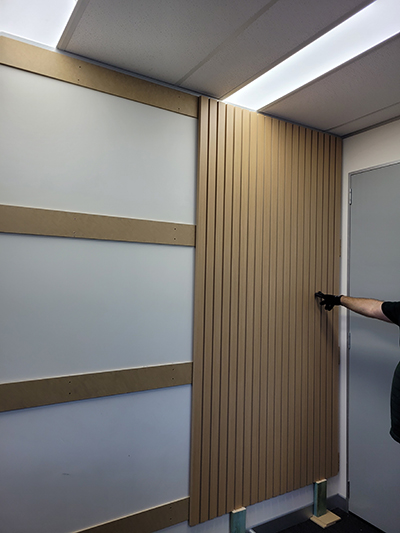
3. Use packers and a spirit-level to position the board for mounting.
Use packers to position the panel in the correct position for fixing.
It is essential to ensure the starting sheet is level/plumb before fixing.
The starting sheet will determine the subsequent sheet placing and height.
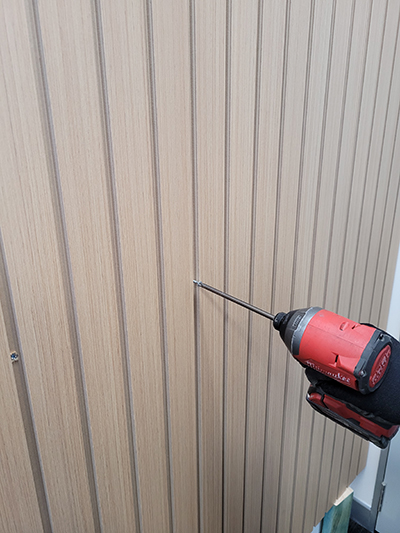
4. Fix the sheet.
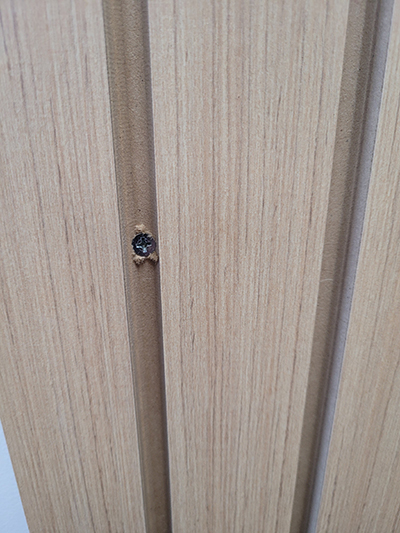
Each groove has a pre-routed chamfered channel at the bottom of each groove that eliminates the need to counter-sink the screws. Simply drill a 4 mm hole into the centre of the groove and use an 8-gauge screw to attach the panel to the wall.
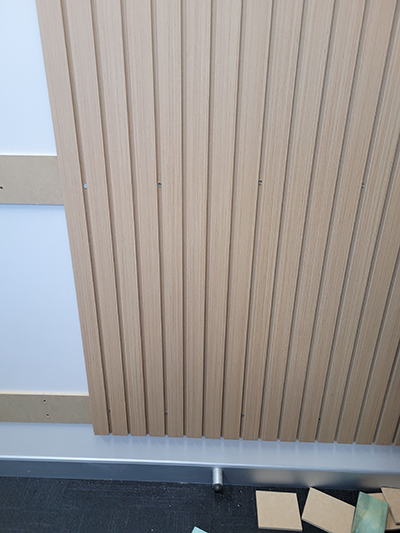
The sheet should be fixed with a minimum of at least 4 rows of fixings and at least 4 screws in each row.
Each panel weighs approx. 35 kg (12.15 kg/m2) so please ensure your mounting screws are fit for purpose and you have an appropriate number of mounting points with an adequate safety margin allowed.
5. Line up the next sheet.
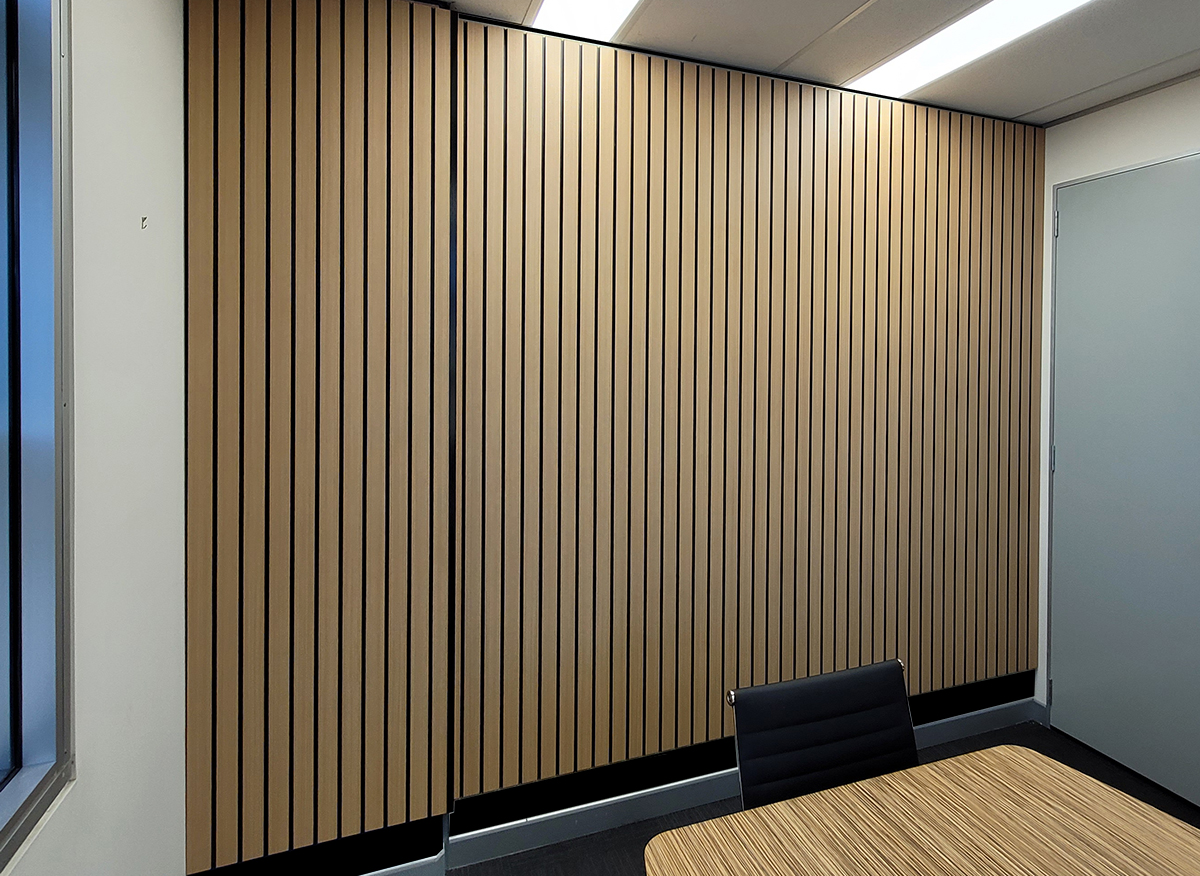
Each Swiftbatten panel has half-groove on the edge of each sheet which forms a single groove line when two sheets are placed together.
Line up each sheet and ensure they are correctly-aligned and pushed closely together. Make sure the join is tight and even up the length of the join.
This join-line will later be covered by the ‘shadow-line’ groove insert to allow all vertical joins to be hidden. This creates a seamless wall of timber slats free of any visible join lines.
If you are stacking panels vertically to cover a wall higher than 2400mm cut the next panel to the appropriate size and install it using a butt-join. For a tight butt join where horizontal batten strips are being used, ensure there is strip on the butt join for a neat clean joint.
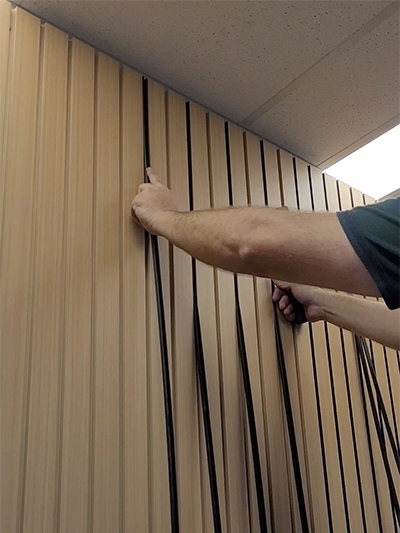
6. Installing the shadow-line inserts
Once all panels are mounted to the wall it is time to start inserting the ‘Shadow-line’ inserts into the grooves.
Check the length of your ‘Shadow-line’ inserts and trim them to 2400mm if necessary. If you have not installed a full panel then trim the inserts to the correct length to match the height of the wall you have installed.
Line up the insert with the top of the groove in the panel. Use a rubber-mallet to insert the first 400-500mm into the groove.
Do this for every 2nd-groove along the wall.
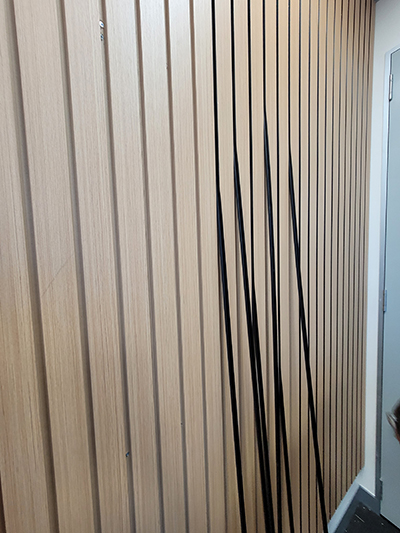
Once this is done use a laminate roller to push the rest of the insert down the length of the channel. Depending on the size of your roller you may be able to do multiple inserts at once.
Once all of these inserts are installed go back and fill-in the remaining grooves that were skipped on the first pass of the wall.
7. Fit trims
Once all trims have been inserted, fit any trims, architraves or mouldings required to complete the installation.